BLOG 10

Finishing Touches

Automation

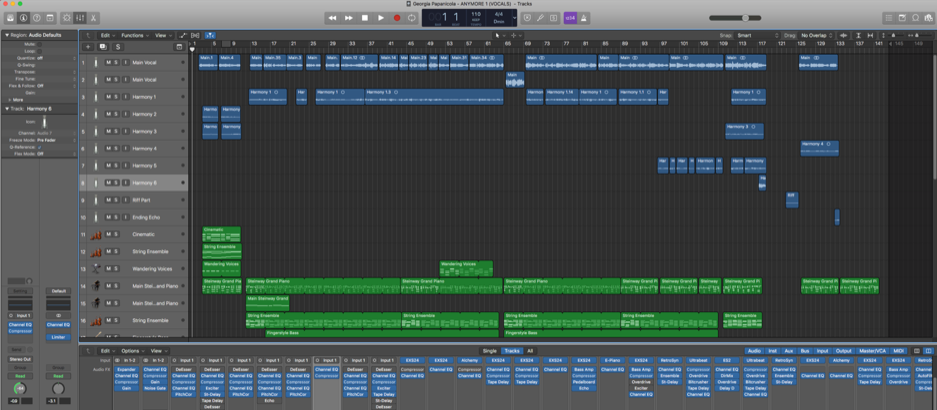
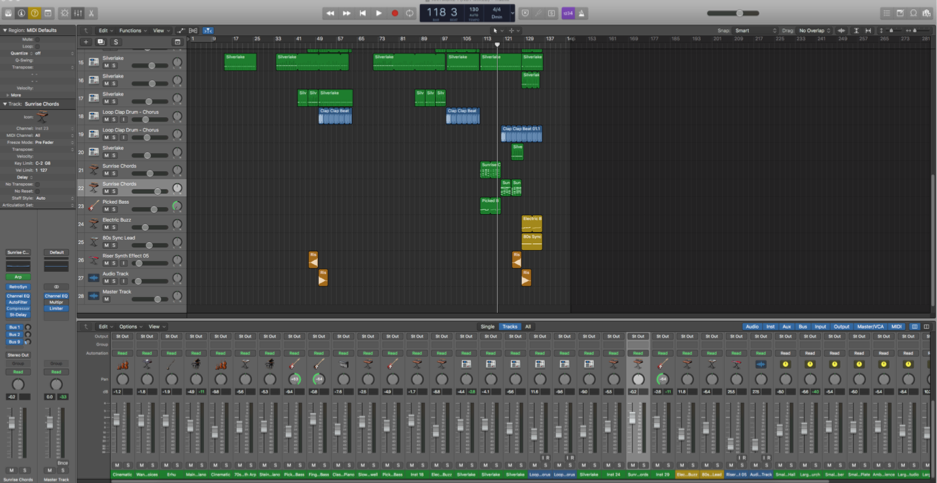
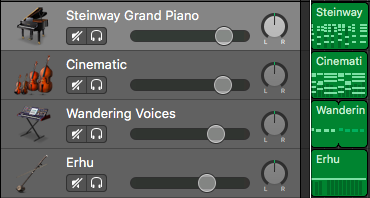
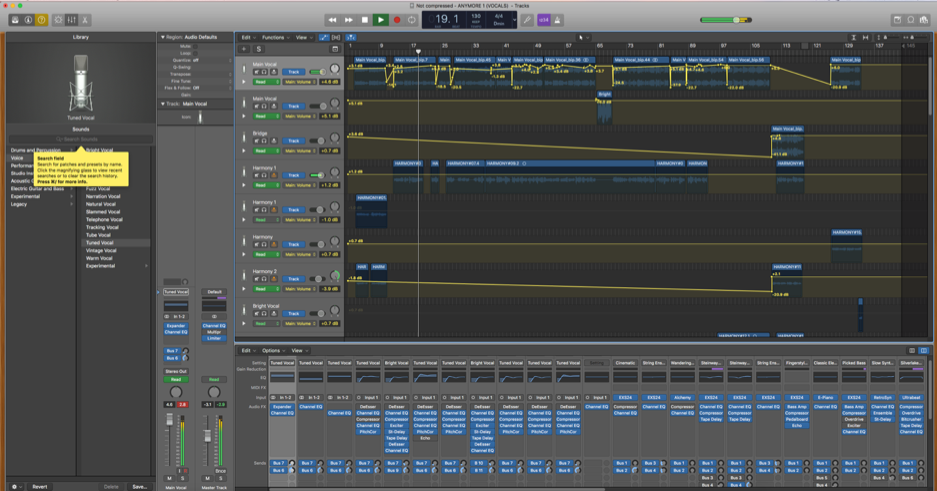
A final touch for the vocals, were to ensure that ‘Automation’ was applied. This was used in order to help ensure that the vocal was the same volume throughout the track, particularly as some parts seemed to be louder than others. This helped, however, some areas still need to be worked on due to clipping.

Automation is your key to mixes that adapt dynamically over time’ – Why Logic Pro Rules, 2018.

Screenshot – Automation Applied

Experimenting

Having completed the initial editing of my song in terms of tidying the instrumentation and making sure that the vocals sound efficient enough that fit seamlessly with the instruments, I wanted to try some final experimentation to my track. I came across this effect in Rihanna’s song called ‘You Da One’ where at the beginning of the track, an ‘underwater’ effect is used.

You Da One: Source – YouTube Chanel Rihanna.

I soon looked into this through YouTube to understand how this effect is achieved. This underwater effect or known as ‘lo-fi’, is created when bouncing down the track, using the ‘touch’ button so that a specific EQ setting is recorded in the process of applying the desired frequencies.

How to Underwater lo-fi muffled effect | Drake sweep effect | Logic Pro x FL Studio Pro Tools – Source: YouTube Chanel Sooper.
Screenshot – Bounced Track & EQ

Experiment

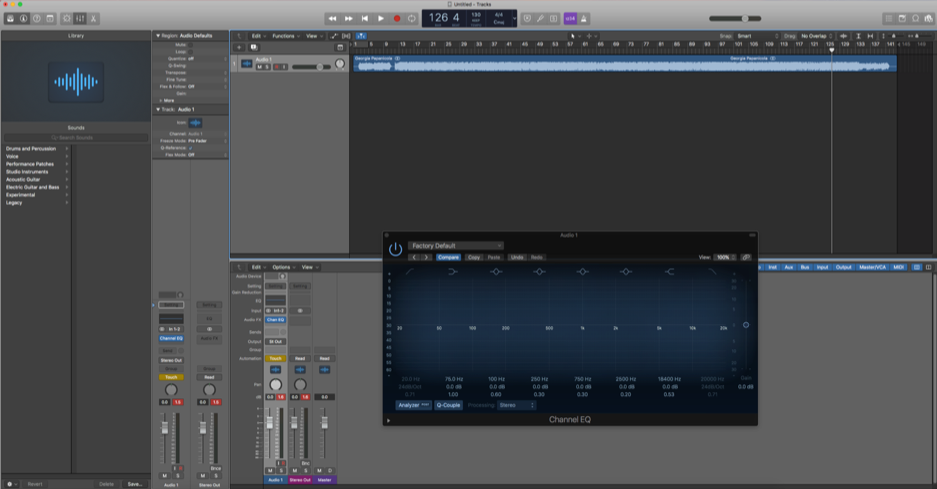
I found this experimentation interesting as it gave an insight into how EQ works more in depth. I applied this technique during the bridge as I believe that it was a perfect time to apply this effect, especially as no vocals were involved during this part of the bridge. Starting the frequencies from 20k and going down, caused a more bass sound which is what I wanted to achieve in this process. This is the outcome of this underwater effect, however, I believe that it does not fit within the genre that I am working with and so I have decided not to involve this within my track.

Limiter

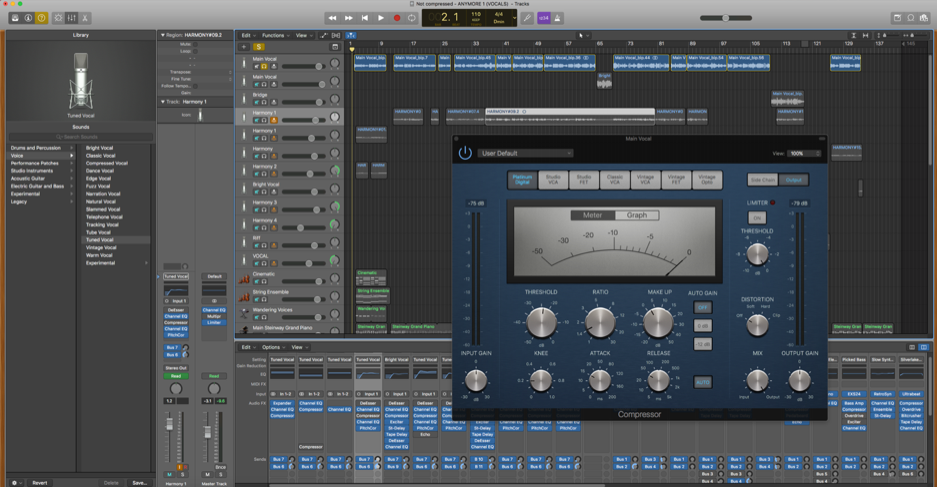
I also added a limiter during the final touches in order to create a final lift to the track. As stated by Bregitzer (2009, p.195) ‘Digital limiters give recordings their perceived loudness’. This suggests that the limiter is an important part of this final mastering stage to get the fullest sound of the track.

Intro

Final Track

I also came to a decision to remove the intro of the song. This is because the song is much stronger without the intro and I feel that it isn’t relevant to the track. Although previously stated that the intro was created to involve modern pop influences, I still feel that the piece without the intro still does have modern influences. For instance the strings that were inspired by Ariana Grande’s song (‘bad idea’).

Final Thoughts

Overall, I am pleased with the outcome of my track. Although there have been many changes in the process such as removing certain aspects within the track, I believe that they have been positive in creating a track that fits within the genre of 90s Dance Pop. This blog has evidently shown the process in creation of my track and the varying decisions of each development. As well as this, the new techniques that have been learnt throughout this process will be used in future when creating tracks through Logic Pro X.

Reference List:

Bregitzer, L. (2009). Secrets of Recording: Professional Tips, Tools & Techniques. Oxford: Taylor & Francis.

Rihanna. (2011). You Da One. [Online Video]. Available at: https://www.youtube.com/watch?v=b3HeLs8Yosw [Accessed May 10th 2019].

Sooper. (2018). How to Underwater lo-fi muffled effect | Drake sweep effect | Logic Pro x FL Studio Pro Tools. [Online Video]. Available at: https://www.youtube.com/watch?v=aDzAlbE8vKI [Accessed May 10th 2019].

Why Logic Pro Rules. (2018). Available at: https://whylogicprorules.com/automation/ [Accessed May 10th, 2019].

BLOG 9

Editing Instruments & Vocals

Currently, I am still in the process of editing the vocal and instrumentation. Focusing on the vocal, I have added effects such as a reverb plug in. This is so that they stand out within the mix. I have also bused the vocals to bus 6 and 10, this is so that all instrumentation and vocals are bused to the same reverb so that it sounds as if they are all in the same space, and as stated by Mayzes (2018) ‘This puts it all in the same space, making your track sounds more cohesive and natural’.

Pitch correction has also been added to the vocals which fits the genre of 90s Dance Pop more specifically due to the dance aspect of the song. Below demonstrates the various effects that have been used in my song on each instrument and vocal. Effects such as Tape delay and Exciter have been used on my vocal to also make them stand out within the track.

Compressing Vocals

Using a compression was a particular important aspect within this editing stage of the vocals. Senior (2012, p.159) states that ‘Use an initial layer of gain reduction to even out overall levels-soft-knee 2:1/3:1 compression with moderate attack and release times is likely to work best’. I took this info on board and looked further into the best settings when compressing vocals. Mayzes (2019) suggests to use these settings to create ‘Light Tonal Compression’:

  • ‘Ratio: 1.5:1’
  • ‘Attack Time: 15ms (but up to 30ms for more punch)’
  • ‘Release Time: 40ms’
  • ‘Threshold: -24dB’
  • ‘Gain Reduction: 2-3dB’
  • ‘Knee: Soft’
  • ‘Makeup Gain: 2dB’

I have used these settings for the vocals and I believe that they have worked efficiently in causing them to be brought out even more so with the reverb.

Looking at the instrumentation, I wanted to focus on making sure that everything was tidy and sounded tight within the piece. In this case, focusing on the piano notes and adjusting the note durations to fit within the song was an important aspect of this. I also needed to ensure that all other effects were working correctly. For instance, the tape delay plugins were not working correctly due to the wet and dry outputs being wrong. The wet output were previously at 0% and the dry output was on 100%, this caused the delay to only be dry. I then changed this by adding more wet to the desired instruments.

What Next?

My main aims during the final stages of editing, is to listen to the track through both speakers and headphones to ensure that everything is perfect in how it sounds. It is also important to look at all of the settings such as the buses to ensure that they are working correctly.

Reference List:

Mayzes, R. (2018). https://www.musicianonamission.com/make-instrument-and-vocal-sit-in-the-mix/

Mayzes, R. (2019). Musician On A Mission. Available at: https://www.musicianonamission.com/vocal-compression-how-to-compress-vocals/ [Accessed May 6th].

Senior, M. (2012). Mixing Secrets. Burlington: Taylor & Francis.

BLOG 8

Editing Process

Recording the vocals was successful and I believe that I will be able to edit them effectively to fit the track that I have created. I found that the process of recording my vocals went well and each step from setting up the equipment to correctly using the mixing desk was positive.

Microphone

It was important to consider what microphone to use for the recording of my vocals. In this case, I used a condenser rather than a dynamic mic. After learning to use a condenser microphone in the workshop lecture, I wanted to further look into this before recording my vocals in the studio. Condenser microphones are used mainly for vocal and in order for them to operate, they need phantom power (Pensado, 2018, p.7).

Condenser: Source- Pensado, 2018, p.7.

After recording the track, I wanted to begin Equalising the instruments using the EQ plugin on Logic Pro X so that I could tell how I’d like the vocals to sound with them. However, after editing each instrument one at a time, I faced some issues with the sound after listening to them together.

As you can hear, the instruments sound muddy now that they have been edited using the equaliser. This is because too many lower end frequencies are clashing which have caused a muddy sound and texture, this can be heard specifically in the piano. Grimshaw-Aagaard and Pedersen (2019, p.201) state that ‘Attenuation of the low end is often used to avoid mudiness’. My main aim after coming across this issue, is to get rid of the Equalisation that I have done and start over.

Instead of starting with editing the instruments first, this time I have edited the vocals by adjusting the volume in the EQ plug in. This is so that I am able to hear the vocals more clear in the mix with instruments. This will also help me to consider which instruments need to be adjusted against the vocal. Below is the version whereby I have brought the vocals out by editing the vocals to be at the level I would like them to be heard in the track.

Currently, the vocals do not fit with the the rest of the instrumentation when listening with headphones. This is because the vocals are being bused to a reverb plugin on their own and different to what the instruments are bused to. To sort this, I will need to send the vocals to the same bus as the instruments so that all instrumentation and vocals sound as if they are recorded in the same space. This will also allow the vocals to come out of the mix more and sound less boxy.

I have also deleted the ‘Erhu’ instrument from the intro of the track. This is because my vocals have replaced this instrument and I feel that my vocals are more well fitted to this part of the song.

What Next?

My next steps are to continue to edit both vocals and instruments in order to create a coherent sounding piece that sound professional in both headphones and speakers. I will also consider tidying up the song by focusing on plugins, the mix (volume of each instrument) as well as MIDI note durations to ensure that they are all tidy and fit well within in the track.

Reference List:

Pensado, D. (2018). Recording Vocals with Dave Pensado: Pensado’s Strive Education Series. Milwaukee: Hal Leonard Corporation.

Pederson, H. and Grimshaw-Aagaard, M. (2019). The Recording, Mixing, and Mastering Reference Handbook. New York: Oxford University Press.

BLOG 7

Mixing Track (Preparation to Record Vocals)

After finishing the track, I want to ensure that the track is ready to mix so that all instruments are in place when recording the vocals. The mix, (as highlighted in a red box), has been adjusted to each volume of how I want each instrument to be heard in the track, however, this will be adjusted once the vocals are recorded according to how well each instrument fits with the vocal audio.

‘Mixing represents the process whereby the musical vision and the audio reality come together’ (Savage, 2014, p.xv).

Furthermore, as it is important to have the track mixed, Pedersen and Grimshaw-Aagaard (2019, p.6) suggest that ‘The headphone mix is not just an almost-good-enough mix: it’s the mix that should motivate the singer to make the best take in recording history.’. This is important so that I am able to record great vocals for my track and in the genre of 90s Dance Pop.

I am pleased with the final mix of my track and will enable me to be experimental with vocals, in this case with the main vocal line and harmonies.

It is true that there is still some muddiness in the track which can be heard through the piano and bass guitars, though I will fix this once the vocals are recorded to ensure that all instruments are of the correct levels and are mastered correctly.

Studio Preparation

Above is a plan of what I will need in the studio to record my vocals and the layout of where I will stand, placement of the microphone, stand, shield, etc. This is to ensure that when going into the studio, everything is well prepared so that the process of recording my vocals runs smoothly.

Microphone Placement:

It is important to ensure that the microphone is placed correctly when recording in the university studio. Rochman (2013) suggests these two areas within Microphone position and placement in the room:

  • ‘The room contributes about 20% to the overall sound. Even on close-miked instruments, the room is far more responsible for the ultimate sound’
  • ‘The mic position contributes about 20% to the overall sound’

Having a lecture on microphone position about this particular studio was helpful. It was discovered that the best place for the microphone in the square, yet small studio booth, should be placed near the corner of the room, off the centre to create a well balanced pick up from the vocal.

It is also important to consider how near or far away I will be standing from the microphone. This is because it will effect the frequency response and how well the voice will be captured and so it is important to think about: how I am positioned (on or off centre) to the microphone and the dynamics when I am singing (Friedman, 2010, p.24).

Reference List:

Friedman, D. (2010). Sound Advice: Voiceover from an Audio Engineer’s Perspective. Bloomington: AuthorHouse.

Pederson, H. and Grimshaw-Aagaard, M. (2019). The Recording, Mixing, and Mastering Reference Handbook. New York: Oxford University Press.

Rochman, D. (2013). Microphone Choice and Placement Secrets for Recording. Available at: http://blog.shure.com/microphone-choice-and-placement-secrets-for-recording/[Accessed: 11th April 2019]

Savage, S. (2014). Mixing and Mastering in the Box: The Guide to Making Great Mixes and Final Masters on Your Computer. New York: Oxford University Press.

BLOG 6

Bridge, Instruments & Lyrics

The Bridge

Going back to notation software ‘MuseScore’, when creating the bridge, I came across the idea of using the same chords as the verses (Dm, Bb, C, C), but arranging them in a different order. The chords for the bridge firstly started off as Bb, C, F, C, although I felt that this order did not initially work well to create a build up to the last chorus. Therefore I changed the F chord to a Dm chord which creates more emotion to the song. The chords now follow as – Bb, C, Dm, C.

Bridge Chord Progression

I further experimented with the bridge by layering various instruments such as bass and strings. I also found a Synth that worked really well with this part called ‘Sunrise Chords’, creating a gripping effect to this part of the track. Furthermore, I also had a browse at the various drum loops in Logic, this is because the drum loop that I have created for the verse and chorus is not strong enough for the bridge.

I have also decided that this drum loop should also be used softly during the chorus. This allows the chorus to be thicker in how it sounds rather than just the drum loop that I have created previously.

I am pleased with the outcome of this bridge and feel that it was important to incorporate a bridge in the song. Heartwood and Davidson (n.d., p.7) states that a bridge ‘is used to break up the repetitive pattern of a song and keep the listeners attention.’. The bridge will be further worked on once the vocals are recorded. This is so that all instrumentation work and sound good together.

Sound Effects

After ensuring that my structure and instrumentation was finally how I wanted it to sound, I wanted to also add some sound effects to the song where appropriate. An effect called ‘Riser Synth’ that I found in loops was added to my track in order to create build up from verse to chorus. This has been brought in and out of the track during the build up to the chorus.

Lyrics

I have now come up with a final set of lyrics that I believe fits the track really well. The song is based on someone not knowing what to do in their relationship, wanting to be with that person but knowing that it is wrong. This really fits the chords of the song, particularly the bridge as it creates an emotion that anyone can relate to.

Before

After


What Next?

Now that the track is finished in terms of the structure, instrumentation and lyrics, I will now plan and consider how I will record my vocals in the studio. It is important that I record the vocals in one session in the studio, this is because of the settings during the recording of the vocal, the microphone position and position of the vocalist could cause the vocal audio and track to be inconsistent (Benediktsson, n.d.).

Reference List:

Benediktsson, B. (n.d.). How to Get Vocals Consistent When Recorded on Different Days. Available at: https://www.audio-issues.com/recording-tips/recording-vocals-consistently/ [Accessed 1st April 2019].

Heartwood, K., Davidson, J. (n.d.). Songwriting for Beginners: An Easy Beginning Method. USA: Alfred Music.

BLOG 5

Continuing To Build Structure

I have been successful in creating my track in Logic Pro X and forming the verses and the chorus’. After producing the verse and chorus structure, I focused on layering various instruments from piano, bass and to varying synths as shown in the screenshot below. I have also added a string ensemble as it adds another layer to the track and creates harmony (Plachno, 2014, p.61) fitting well with the other instruments I have formed.

Layered Instruments

Building the Structure

Instead of using the drum loops that I found on Logic, (as shown in the previous blog) I have instead created my own by using the software electronic drum kit called ‘Silverlake’. I find that this initially works better and has a much deeper, thicker sound that I was hoping to achieve. It particularly fits nicely with the other instruments, however, it needs be adjusted in the mixing process as the kick drum has formed the most prominent part of the track and is somewhat the ‘pulse’ of the song (Bennett, 2008, p.160).

Kick Drum Loop

The Kick Drum – Self Made

Modern Pop & 90s Dance Pop Incorporated

Furthermore, I have also created an intro to my song. In Blog 3, I showed a slower version of my song which I did not initially like, however, I feel that this could create an interesting effect/mood to the song and I wanted to somewhat incorporate this into my track. This was done by forming a slow intro tempo and to then changing the tempo to be more upbeat. This is to create the essence of 90s Dance Pop once the upbeat sound comes in. This is also forming together more modern and 90s Dance Pop ideas together.

The slow intro idea came from a recent song by Ariana Grande called ‘bad idea’ where in the middle of the song (at 3:10) the music changes as an orchestral arrangement is played, completely altering the sound of the song. However, after this section of the song, the beat comes back in. I really loved this effect and wanted to incorporate it into my own track, though during the start of the song.

Ariana Grande – bad idea – (Source: YouTube – Ariana Grande)
Intro

The instruments that I have used for this intro are – piano (main body of the piece), strings in a ‘Cinematic’ effect, a synth called ‘Wandering Voices’ that creates a thicker layer, fitting well around the other instruments and finally an interesting choice of instrument called ‘Erhu’ which works perfectly with the rest of the instruments.

Instruments


The intro begins at 110 tempo and then changes to 130 once the verse begins. This slight change in tempo has allowed the track to be more vibrant in how it sounds and creates a surprise on the listener when the verse comes in.

Staggered Instruments (Build Up)

As inspired by 90s Dance/Electronic songs, I want to ensure that this style is delivered correctly to the listener. Creating each instrument to come in at a different times (staggering) creates a excitement to the song. I have done this by making the piano start, then the drums and bass to gradually come in. This is done in various 90s Dance songs such as ‘What Is Love’ by Haddaway, as the bass and drums come in after the main melody at the beginning of the song.

Haddaway – What Is Love (Official) – (Source: YouTube – CocunutMusicGermany)

Intro and Start of Verse – Together

Intro & Beginning

I am pleased with the outcome of the intro and the verses of my song. Although the instruments sound muddy like the bass, this needs to be adjusted during the mixing and mastering stages by adjusting the frequencies and dynamics to form a clear sound to the piece. This will be done in a later process once the track and vocals are recorded.

Reference List:

Ariana Grande. (2019). Ariana Grande – bad idea. [Online Video] 14 February. Available from: https://www.youtube.com/watch?v=m7XHduHsBvk [Accessed 20th March 2019].

Bennett, S. (2008). Logic Pro 8: Tips and Tricks. Norfolk: PC Publishing.

CoconutMusicGermany. (2014). Haddaway – What Is Love. [Online Video] 18 June 2014. Available from: https://www.youtube.com/watch?v=HEXWRTEbj1I [Accessed 20th March 2019].

Plachno., R.J. (2014). Becoming a One Person Band.

BLOG 4

Constructing Song – Logic Pro X

Since creating my chords and melody into a notation system called ‘MuseScore’, I will now move into using a DAW (Digital Audio Workstation) in order to further progress this track and start the creation.

My main aim is to build a track using software instruments and then record my vocal separately in the studio. I feel that this will be successful in terms of taking my time to effectively create a song in Logic Pro X with no rush, but to make sure I keep on track and plan ahead.

Decision of Intruments

Experimenting with various software instruments in Logic such as: piano, bass, strings, and a brass synth, has led me to think about the sound of my song. I believe that these instruments work well together so far and layering various instruments will allow me to create a fuller sound. Adding sound effects to my song that are often used in Pop track productions will also ‘add ear candy and help renew excitement throughout the arrangement’ as suggested by Nahmani (2015).

Below is a screenshot of software instruments I have recorded so far. In this case, I have only recorded the intro of the song to gain a sense of how the instruments will sound before going further with making the structure.

1) Instruments

The second screenshot shows the process of how I have added more instruments though I may have too many bass guitars. This could be adjusted in further process, as having more than one bass guitar could be too overpowering.

2) Instruments

I have also listened to various drum loops to lead the intro into the first verse. I couldn’t find any singular kick sounds that had a low/deep sound I was hoping for, however, this could be a process of editing the sound loop or even forming my own using software drums.

Potential Drum Loops

Drum Loop 1
Drum Loop 2

Having looked at the various kick drum loops on Logic, these two (Festival Kick) are the ones that caught my attention and could somewhat work with what I am hoping to achieve in terms of sound. Apple Loops on Logic allows you to adjust to the tempo or key of the track on its own, making it easy to work around (Cousins and Hepworth-Sawyer, 2014, p.76).

I could possibly edit these in terms of reverb and ambience in order to fit the sound with the rest of the instruments. The first drum loop is probably the best one that I have found on the Loops list, however, when placing it with the other instruments, I found that it wasn’t as thick in sound and didn’t stand out as much as hoped.

The second loop that I found somewhat worked better when placing it with the instruments. This could be due to it having more bass and thicker in sound or texture.

Reference List:

Cousins and Hepworth-Sawyer. (2014). Logic Pro X: Audio and Music Production. Burlington: CRC Press.

Nahmani, D. (2015). Logic Pro X 10.1: Apple Pro Training Series: Professional Music Production. Peachpit Press.

BLOG 3

Building a Melody & Writing Lyrics

After making a basic chord sequence and structure for my song, I wanted to start getting ideas for a melody down. As stated by Perricone (2000, p.2) ‘The melody is usually the most memorable aspect of a song, the one the listener remembers and is able to perform’. The first melody was achieved by looping the chords and singing anything that came to mind. Below is a starting point of the melody that I have come up with for the first verse that I have notated on the software ‘MuseScore’. This is so that I can remember what I have come up with and use in future when recording into a DAW (Digital Audio Workstation).

Melody 1 – First Verse

After success with the first melody line, I started to struggle with ideas for the next melody, in this case, for the pre-chorus. I wanted to do some research into how songwriters create a melody and the specific techniques that they use. A video that I have found on YouTube by Charlie Puth, describes the process of how he creates successful pop songs such as ‘Attention’. This video has inspired me to try the same techniques that Puth uses, for example such as recording ideas straight to his phone when something comes to mind.

See Charlie Puth Break Down Emotional Hit Song, “Attention” – (Source: YouTube – Rolling Stone)

In order to record my ideas as inspired by Puth, I have done this by playing the piano and singing whatever comes to mind (click SoundCloud link to listen).

Similarly to Puth, my song is currently slow, sad and isn’t the style that I am hoping to achieve as an end result. However, as a starting point, this is perfect in the direction that I am hoping to attain and will be altered in the process in terms of tempo, instrumentation, rhythm and more when wanting to achieve the 90s Dance Pop genre sound.

Below is the melody for the Pre-Chorus that I have notated to remember when coming back to create and record.

Melody 2 – Pre-Chorus

For the melody of the chorus, I began by singing a melody, however, it did not quite fit the chords as well as I wanted it to. As shown below, I have made slight adjustments to the melody; before showing the melody going up the scale, but now the melody is going down the scale, initially fitting the chords better and producing an emotion. This will be further worked on in creation of the song in Logic Pro X and when recording my vocal in the studio.

Chorus Melody – Before

Chorus Melody – Draft 1

Chorus Melody – After

Chorus Melody – Draft 2

Lyrics – Draft 1

When recording my idea, some lyrics came to mind that fitted perfectly with the melody that I was singing, though this will be changed in the process so that the words have more meaning and fit the effect of the song. Below are the lyrics that I have come up with so far with direction notes, in order to remind myself that certain areas could be altered. It is vital that I work on these lyrics in order to create a story to my song, but so that it fits the genre I am hoping to achieve. Stolpe (2007)

‘Whether we are writing for ourselves or for someone else, the objective is always the same -to cause a significant experience in the mind and heart of our listener’ (Stolpe, 2007)

Reference List:

Perricone, J. (2000). Melody in Songwriting: Tools and Techniques for Writing Hit Songs. Hal Leonard Corporation.

Rolling Stone. (2017). See Charlie Puth Break Down Emotional Hit Song, “Attention” [Online Video] 3 October 2017. Available from: https://www.youtube.com/watch?v=IU8BEMi8UyM [Accessed: 7th March 2019].

Stolpe, A. (2007). Popular Lyric Writing: 10 Steps to Effective Storytelling. Nashville: Hal Leonard Corporation.

BLOG 2

Creation of Chords

Having gathered my initial thoughts on what genre of music I would like to create my song in (90s Dance Pop), it has allowed me to begin the developments of my song in terms of: chords, melody and the overall structure.

‘Writing a song is very much like fitting pieces of a puzzle together: once you get going with an idea, it’s a matter of laying your pieces out on the table and then getting them to fit’ (Davidson and Heartwood, n.d., p. 4). 

When it comes to songwriting, I always start constructing a chord sequence with at least 3-4 chords so that I can then create a well shaped melody around it. As stated by LaGrange (2002, p.1) ‘Chords are used as harmony, which fill in the melodies, or “accompany” the melodies’. In this case, I am creating a chord sequence in order to help create a sense of direction in how I would like my melody to sound.

Below is the first draft of my chord sequence for the verses of my song which follow as – Dm, C, F, C. I have used simple triads which are ‘…the basic building blocks of harmony’ (Johnson, 2009, p.10) in order to begin my song in a simple form.

Verse Chords – Draft 1

Verse Chords – Draft 1

I found that this chord sequence somewhat worked, but it was difficult to create a fitting melody around it (click Sound Cloud link to listen).

In order for the chords to be more static in how they sound and to be able in producing a melody, I wanted to try and add another chord or change/adjust the order of chords that I already have.

This led me to adding another chord and changing the chord sequence to Dm, Bb, C, C. Although this chord sequence only uses three chords (and repetition of C), I feel that this will make it easier to create a catchy melody and will fit the genre of 90s Dance Pop.

Verse Chords – Draft 2

Verse Chords – Draft 2

These chords work well together and will allow me to be further experimental when creating the melody.

As these are only the chords from the verses, I will be adding other chords to the chorus to add more depth. This will ensure that the song is not a continuous loop of the same chords, as this could bore the listener and not show a variety of ideas and experimentation.

Chorus Chords – Draft 1

Chorus Chords – Draft 1

For the chorus, I have added an F chord. I am happy with the way that this chorus sounds as I do not want to adjust it too much as changing the chords completely can make it difficult to create a transition from verse to chorus.

Structure of Song

It is common that most Pop songs follow a structure of ‘Introduction, Verse, Chorus, Verse, Chorus, Instrumental Bridge’  (Sfetcu, 2014), however, I want to slightly change this by arranging my song as:

Structure of Song

I have added a Pre-Chorus as this would be a good build up to the chorus that uses the same chords, but will be adjusted with software instruments during the editing of my song in Logic Pro X.

Reference List:

Davidson and Heartwood. (n.d.). Songwriting for Beginners: An Easy Beginning Method. USA: Alfred Music.

Johnson, M. (2009). Pop Music Theory. Boston: Lulu.com.

LaGrange, A. (2002). Intermediate Piano Chords. Santee: Music and You.

Sfetcu, N. (2014). The Music Sound. Nicolae Sfetcu.

BLOG 1

Ideas & Inspiration

In order to begin the process of creating my song, I wanted to gather ideas from a variety of songs to gain a sense of what style and direction I would like to achieve. This will enable me to be creative and experimental when developing my song in Logic Pro X.

I first began developing my ideas by listening to various songs in the current charts so that I could gain a sense of what music is like today in terms of style, genre as well as the instrumentation that is used. Many of the songs are genres of Pop and Hip Hop, however, one song that stood out to me in particular was a song called ‘1999’ by Charli XCX and Troy Sivan which is inspired by 90s pop.

Charli XCX & Troy Sivan – 1999 (Source: YouTube Channel – Charli XCX)

The song is clever in the sense that its lyrical content talks about the 90s and also uses recognisable musical elements/instruments from 90s Dance Pop such as: a catchy bass guitar, piano, electronic drums, synths and more.

Below are some of the ideas that I have written down from what I have heard from 90s Dance Pop songs and these ideas will prove useful in the construction of my track.

These ideas have also led me to further research into 90s Dance Pop with songs such as ‘Waiting For Tonight’ by Jennifer Lopez, a hit song from 1998 (Harrison, 2011, p.11). This has inspired me to try and create something similar in terms of its structure, considering the melody, chord sequence and instrumentation to produce a love song that you can dance to.

Furthermore, other songs such as ‘Pump Up The Jam’ by Technotronic and ‘Be My Lover’ by La Bouche are other examples of stylistic elements I would like to use in my song.

Jennifer Lopez – Waiting For Tonight (Source: YouTube Channel – Jennifer Lopez)

From these findings, my main aim is to somewhat bring 90s Dance Pop elements to my song, but to also add modern Pop elements to my piece which will be explored further in the process.

Reference List:

Charli XCX. (2018). Charli XCX & Troye Sivan – 1999 [Official Video]. [Online Video]. 11 October 2018. Available from: https://www.youtube.com/watch?v=6-v1b9waHWY. [Accessed: 3rd March 2019].

Harrison, T. (2011). Music of the 1990s. California: ABC-CLIO.

Jennifer Lopez. (2009). Jennifer Lopez – Waiting For Tonight. [Online Video] 23 November 2009. Available from: https://www.youtube.com/watch?v=_66jPJVS4JE [Accessed: 3rd March 2019].